Getting Your San Jose Home Ready for an Electric Vehicle Charger
Understanding What an EV Charger Installation Requires
Adding a dedicated charging circuit for an electric vehicle is more than just mounting a box on the wall. The real work often happens behind the scenes, inside your main electrical panel. Many homes in San Jose were built years ago, and their electrical systems were sized for typical household loads, lights, appliances, maybe a central air conditioner. An EV charger adds a continuous load that can be as high as that of a whole second home. Before you can plug in, your service panel and its capacity need to be evaluated. This article walks through the steps to prepare your home for an EV charger, focusing on the electrical upgrades that make the installation safe, efficient, and code-compliant.
Step 1: Evaluate Your Current Electrical Service
The first step is to understand what your home currently has. Your main service panel, the metal box with circuit breakers, usually in the garage, basement, or utility room, is the heart of your home's electrical system. The rating of that panel, measured in amperage, tells you how much total electrical current your home can draw from the utility. Common residential panels are rated for 100, 125, or 200 amps. An EV charger typically requires a dedicated 40- to 60-amp breaker, which is a significant portion of your total capacity. A qualified electrician can perform a load calculation, which adds up all the continuous loads in your home, lighting, HVAC, kitchen appliances, and so on, and compares that to the panel's rating. If the existing load plus the new EV charger exceeds the panel's capacity, you will need an electric vehicle panel upgrade. This can mean either increasing the service from the utility (which may involve a larger panel and new wiring from the street) or installing a load management system that dynamically balances the charger's draw with other loads.
What to Watch For
If your home has a 100-amp panel and you already run a central air conditioner, an electric range, and a dryer, you may be close to the limit. Older homes with 60-amp service will almost certainly need a panel upgrade. Also check whether your panel has any empty breaker slots. Even if it does, the bus bar inside the panel must be rated for the additional breaker. A professional can tell you if a simple breaker swap is possible or if a full panel replacement is needed.
Step 2: Assess the Charging Equipment and Its Power Requirements
Not all EV chargers are the same. Level 1 chargers use a standard 120-volt outlet and are very slow. Level 2 chargers, which are the most common for home installations, require a 240-volt circuit and can deliver 16 to 40 amps. The higher the amperage, the faster the charge, but also the larger the load on your electrical system. A typical Level 2 charger draws 30 to 40 amps. For comparison, an electric clothes dryer draws about 30 amps, and an electric range draws 40 to 50 amps. The charger's continuous load is steady for hours, which is different from intermittent loads like a refrigerator that cycles on and off. This continuous nature is why the electrical panel and wiring must be sized carefully. The charging equipment itself will specify the required breaker size and wire gauge. A 40-amp charger needs a 50-amp breaker and 6-gauge wire, for example. An electrician can match the charger's specifications to your home's electrical system.
What to Watch For
Some chargers offer adjustable amperage settings, which can be set lower to stay within your panel's capacity without a full upgrade. This is a good option if you do not need the fastest possible charge. Also consider whether you want a hardwired charger or a plug-in unit that connects to a NEMA 14-50 outlet. Hardwiring is generally more reliable and can handle higher amperages, but a plug-in unit is easier to replace later.
Step 3: Check Local Permit Requirements and Utility Incentives
San Jose and Santa Clara County have specific permit requirements for electrical work, especially for new circuits and panel upgrades. A permit is typically required for installing a new dedicated circuit, upgrading the service panel, or making any changes to the main electrical service. The permit process ensures the work is inspected and meets current electrical codes, which are in place for safety. A licensed electrician will handle the permit application as part of the job. Some utilities in the Bay Area offer rebates or incentives for installing EV chargers and for upgrading the electrical panel to support them. These incentives can offset some of the cost of the panel upgrade. Your electrician or the utility's website can provide current information.

What to Watch For
Make sure the electrician you hire is licensed and insured, and that they are familiar with San Jose's permit process. Work done without a permit can create problems when you sell the home, and it may not be covered by insurance if something goes wrong. Also, some older homes in San Jose have aluminum wiring, which requires special connectors and careful handling. The electrician should inspect for that.
Step 4: Plan the Charger Location and the Conduit Route
Where you put the charger matters. Ideally, it should be close to where you park the EV, with enough slack in the cable to reach the vehicle's charging port. The charging equipment needs to be mounted on a wall or a sturdy post, and it must be accessible. The conduit that carries the wiring from the panel to the charger should follow a safe, protected route. If the panel is in the garage and the charger is also in the garage, the run is short and simple. If the panel is on the opposite side of the house, the conduit may need to run through the attic, crawlspace, or along exterior walls. This can add to the labor and material costs. The electrician will plan the conduit path to minimize bends and length, which helps with wire pulling and reduces voltage drop.
What to Watch For
If you park in a driveway or a detached garage, the charger location may be outdoors. Outdoor-rated charging equipment is required, and the conduit must be weatherproof. Also consider future-proofing: if you might add a second EV later, run a larger conduit now so that pulling additional wires is easier. Some homeowners choose to install a sub-panel or a load management system that can handle multiple chargers.
Step 5: Perform the Electrical Panel Upgrade or Load Management
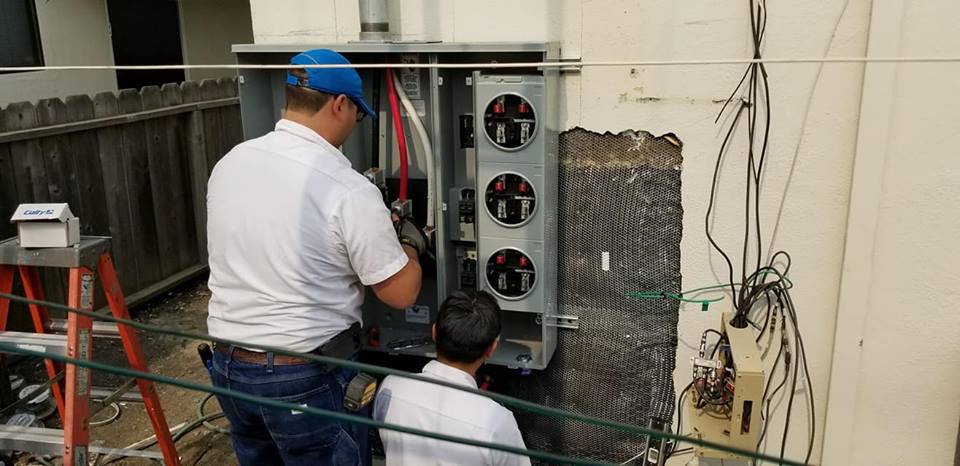
This is the core of the preparation. If the load calculation shows that your panel has enough capacity, the electrician can simply add a new breaker and run the circuit to the charger. If the panel is at or near capacity, there are two main paths. One is to upgrade the service panel to a higher amperage rating, which may involve replacing the panel itself and possibly upgrading the service entrance cable from the utility. The other path is to install a load management system, which uses a current transformer to monitor the total load on the panel and dynamically reduces the charger's power draw when other large appliances are running. This can allow you to install a charger without a full panel upgrade, saving money and avoiding a utility coordination process. Both approaches result in having panels ready for vehicle charging. The electrician will also verify that the grounding and bonding are adequate for the new circuit. A ground rod or a bond to the water pipe may need to be added.
What to Watch For
A panel upgrade can be disruptive. The power to the whole house must be turned off for the swap, which means no lights, no HVAC, and no appliances for several hours. Plan for that. Also, the utility may need to schedule a service disconnect and reconnect, which can add days to the timeline. A load management system avoids that disruption but adds a piece of equipment that needs to be configured correctly. Make sure the electrician explains how the load management works and whether it will limit your charging speed during peak usage times.
Step 6: Have the Installation Inspected and Test the System
After the electrical work is complete, the permit requires an inspection by the city or county building department. The inspector will check that the panel is properly labeled, that the breaker is the correct size, that the wiring is secure, and that the charger is installed according to the manufacturer's instructions and the code. The inspection is a safety net. Once it passes, the electrician can turn on the circuit and test the charger. The charger will go through a self-test, and you can then plug in your EV for a first charge. The charging speed should match what the equipment is rated for, and the panel should not trip or feel warm to the touch. After a few uses, you may notice that the charger's behavior changes if a load management system is installed, for example, it may slow down when the air conditioner kicks on. That is normal.
What to Watch For
Keep the paperwork from the permit and inspection. It documents that the work was done properly, which is useful when selling the home. Also, note that some chargers have Wi‑Fi connectivity and apps that let you monitor charging history and set schedules. Those features are separate from the electrical installation but can help you manage your energy use. If the charger seems to be charging slower than expected, check the settings in the app or consult the electrician to confirm the circuit is delivering full amperage.
Final Pointers for a Smooth Process
Getting your home ready for an EV charger is not a do-it-yourself project. The electrical work involves live service panels, high currents, and code requirements that change over time. Hiring a licensed electrician who specializes in residential EV charging is the safest route. They can evaluate your existing panel, recommend the best approach, whether that is a simple circuit addition, a load management system, or a full panel upgrade, and handle the permits and inspection. The result is a home that has panels ready for vehicle charging, with no guessing about capacity or safety. As more homes in San Jose make this transition, the demand for skilled electricians who understand panel upgrades and load management continues to grow. If you are planning to buy an EV soon, starting the electrical preparation early, ideally before the car arrives, avoids the stress of waiting for a charger installation. The process, from evaluation to inspection, typically takes one to two weeks, depending on the complexity and the utility's schedule. With the right preparation, you can charge your EV at home with confidence, knowing that your electrical system is ready for the load.